Access Amazon EC2 Instances Remotely using Instance Connect without Public IP
EC2 Instance Connect
Amazon EC2 Instance Connect provides a simple and secure way to connect to your Linux instances using Secure Shell (SSH). With EC2 Instance Connect, you use AWS Identity and Access Management (IAM) policies and principles to control SSH access to your instances, removing the need to share and manage SSH keys. All connection requests using EC2 Instance Connect are logged to AWS CloudTrail so that you can audit connection requests.
You can use EC2 Instance Connect to connect to your instances using the Amazon EC2 console or an SSH client of your choice.
When you connect to an instance using EC2 Instance Connect, the Instance Connect API pushes an SSH public key to the instance metadata where it remains for 60 seconds. An IAM policy attached to your user authorizes your user to push the public key to the instance metadata. The SSH daemon uses AuthorizedKeysCommand and AuthorizedKeysCommandUser, which are configured when Instance Connect is installed, to look up the public key from the instance metadata for authentication, and connect you to the instance.
How it works
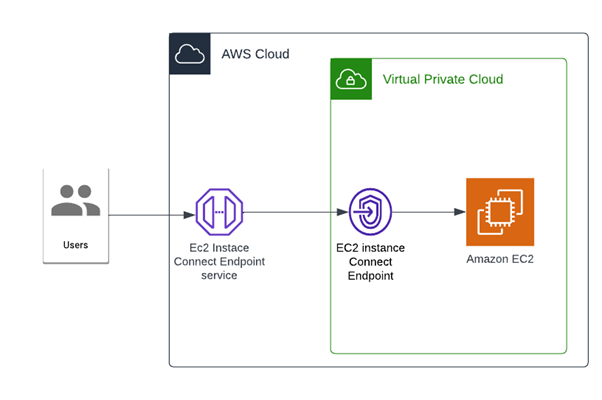
First, you create an EC2 Instance Connect Endpoint in a subnet in your virtual private cloud (VPC). Then, when you want to connect to an instance, you specify the ID of the instance. You can optionally provide the EC2 Instance Connect Endpoint. The endpoint acts as a private tunnel to the instance.
Once you create an EC2 Instance Connect Endpoint in a subnet, you can use the endpoint to connect to any instance in any subnet in your VPC provided your VPC is configured to allow subnets to communicate.
Architecture to follow
Prerequisites
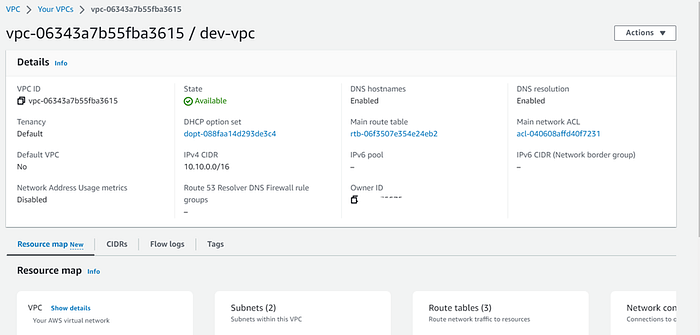
- Create VPC with subnets
- EC2 instance connect Installed
- EC2 instance with port 22 open
Steps to follow
- Security group with port 22 open
- IAM instance profile
- EC2 Instance connect endpoint
- EC2 instance
- Testing
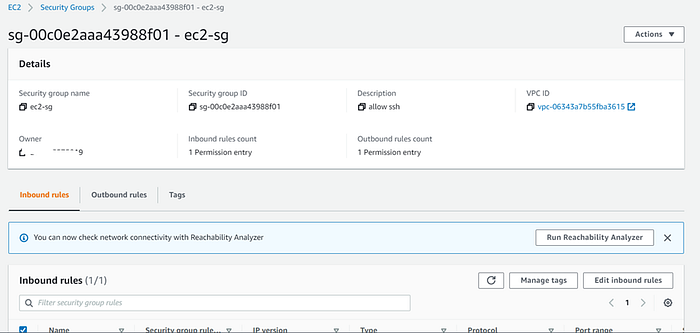
Security Group
Security group for EC2 instance
- Navigate to the EC2 instance, under network & security, click on security groups
- Click on Create Security Group, fill in the name, choose the VPC
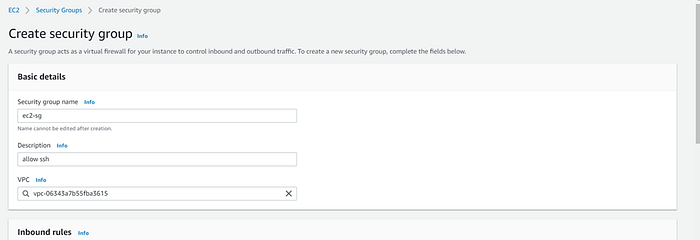
3. Under the inbound rule, click on Add rule
4. Create both inbound and outbound rules for SSH

Now the security group has been created
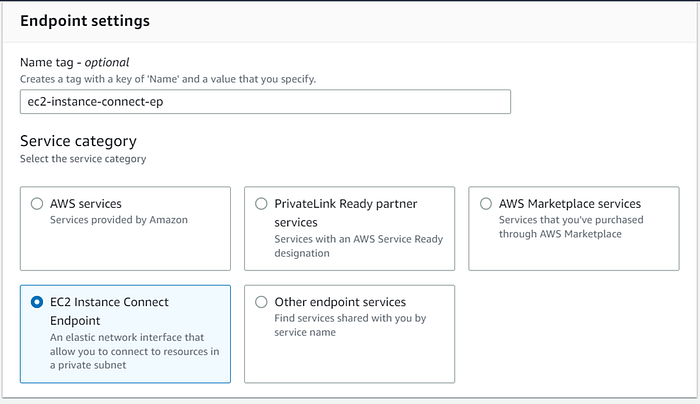
EC2 Instance Connect Endpoint
Let’s create the Instance connect endpoint, navigate to the VPC section
- Click on endpoints, create endpoints
- Fill in the name and choose the service category as EC2 instance connect endpoint
3. Choose the VPC, security group, and subnets

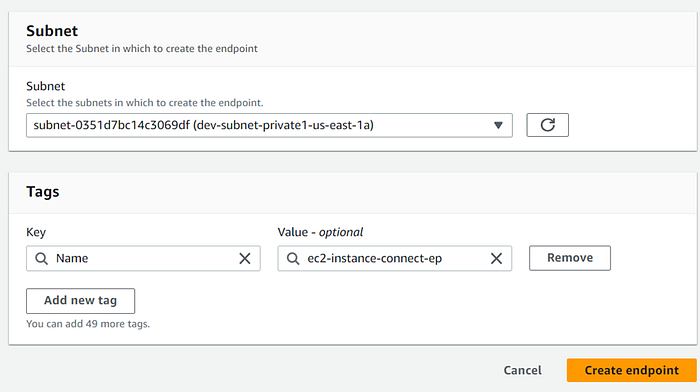
4. Endpoint has been created and is available

EC2 Instance
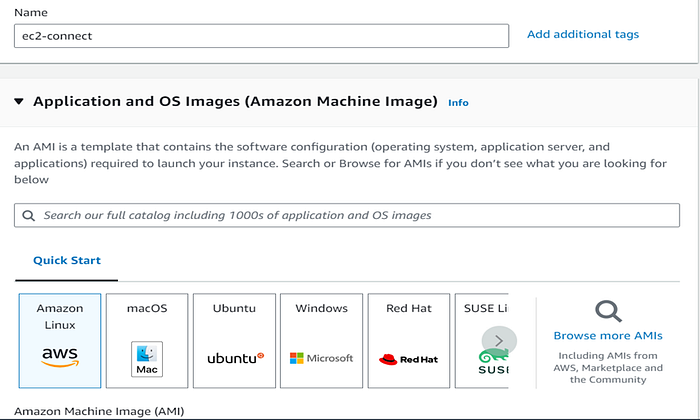
Navigate to the EC2 instance console, click on Launch instance
- Fill in the name, choose Amazon Linux AMI
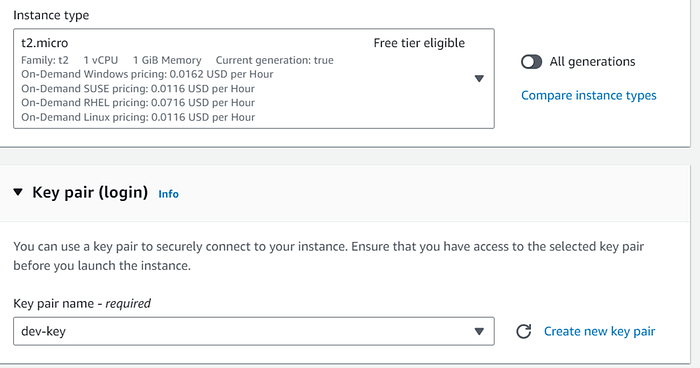
2. Choose t2.micro as instance-type, choose a key pair
3. Choose the dev VPC, subnet, and security group
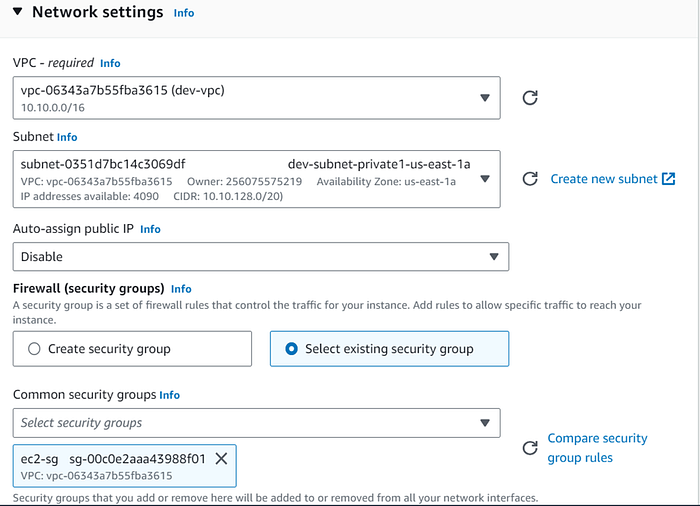
Make sure the Auto-Assign Public IP is disabled.
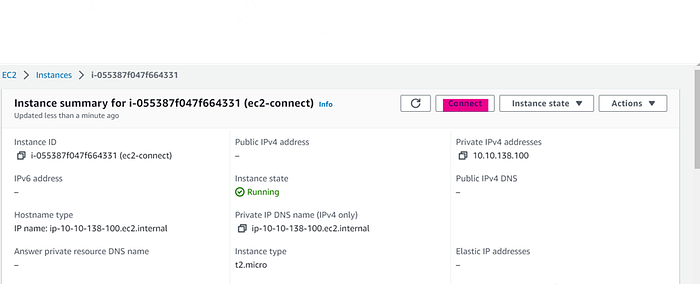
4. Click on Launch instance. Now EC2 instance has been provisioned

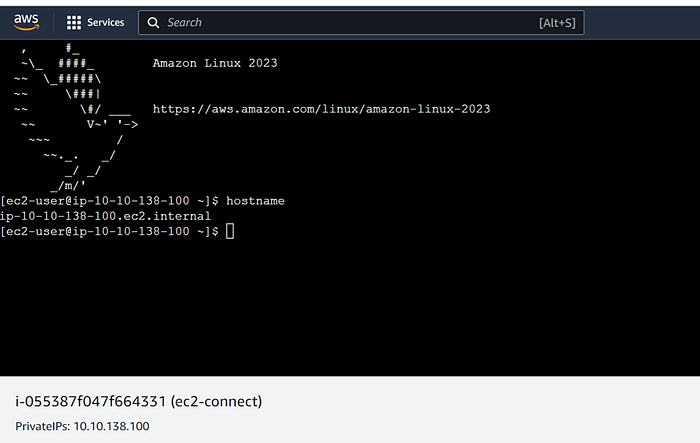
Testing
Let’s click EC2 instance and click on connect
- Click on EC2 instance connect, choose Connect using EC2 instance connect endpoint

2. Then choose the EC2 instance connect endpoint created earlier
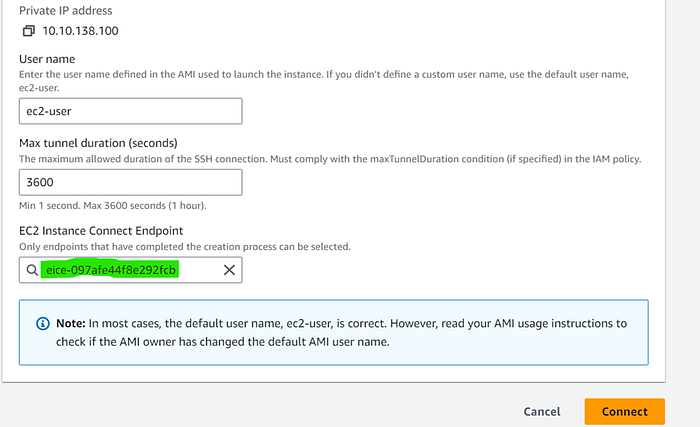
3. After clicking on connect a new SSH window will open, where you can interact with the EC2 instance directly
For user-specific access to EC2 instance follow
Conclusion
EC2 instance connect is a feature by which you can connect your EC2 instance without needing a public IP. You can able to connect the EC2 instance over OpenSSH or CLI using ssh-key we used earlier without a public IP or private connection.